
I protested vehemently and I argued eloquently.
I even resorted to raising my voice and stomping my foot in protest. But
in the end, somehow, through some kind of feminine wiles that I fail to
understand, I agreed to renovate the kitchen.
Not that it didn't need it because oh boy, it realllllly needed it!
My argument was more along the lines of, "with the state of the
world right now extra money might be better spent on a root/bomb cellar or any
number of prepper supplies like maybe respirators or batteries and I don't
know, copious amounts of toilet paper!"
When that didn't work I mentioned that I had spent the entire previous
winter doing minor renovations of one sort or another and "I am just
really exhausted! I'm supposed to be retired!" And finally, the real
kicker argument, "I don't wanna!"
But as usual I was eventually overruled and after a lot of Pinterest
consultations and discussion between Rose, our adult daughters, April, Kait and
myself; our design began to take shape and plans were made.
Little did I know that Rose’s plans and what I thought were our plans
did not jive at all! We were supposed to go to BC to visit her ailing father
and other family and friends and as cabin season was coming to an end we were
really busy there and in our own yard and there was definitely no time to begin
renovations.
So of course, that’s exactly what Rose proposed that we do, she
wanted me to build a paint booth in the back yard and begin painting all of the
kitchen cabinets before winter!
My usual knee-jerk (or just jerk if you prefer) reaction is to say “NO,
it can’t be done! It’s impossible!” And of course that’s what happened, exactly
as my clever wife had planned. Perhaps she knows me too well, or I don’t know
her well enough because I fell for it again.
Once she had elicited my expected reaction to her outrageous painting
proposal, she quickly backed away from the ruse and deftly slipped in a new
more reasonable idea that I found infinitely more doable and so begins our
kitchen renovation story.
If you've ever done much in the way of renovating,
you understand the domino effect that determines the
order in which you can proceed. For us it is the
extreme lack of storage space that we had to factor
into our plans as we thought about the order that
things had to be done.
 |
| This is where we are going |

We decided that step one was to remove
our tiny pantry cabinet in the
kitchen and replace it with two Ikea
"Pax" wardrobe cabinets that we
could stuff full of all of the displaced
kitchen items that we would end up
with when we pulled down one of our
upper cabinets and did away with
all the countertop clutter.
These Pax things are huge and when you
install 3 drawers and 4 shelves
inside each one they are amazingly
spacious and practical as a kitchen
pantry.
One issue with them for us is the very
weak shelves that are only
supported on the sides and not the back.
But with my amazing MacGyver skills I
designed a hack that should make
these shelves able to survive unbowed
for years.
I cut 2x2 pieces to fit under the shelves
along the back, painted them white and
put screws into them through
the sides of the pantry. Mic drop!


Right now getting some products at Ikea is a challenge and
it took over a month to get the shelves in and I ended up cutting down a full
sized shelf to make a microwave shelf above our "coffee bar".
The coffee bar is our favourite part of the pantry setup
right now with the little led strip mounted on the underside of the shelf above
it illuminating the coffee area nicely. For once, everything related to coffee
and tea is located together in one place! We love it.
 |
| The Coffee Bar |
 |
| Ripping out the old counter |
 |
| The new counter installed |
 |
| The weird hole I had to make for the sink |
The countertops cut fairly easily and since we were butting them up against each other and not trying to do 45 degree angles or anything it went very quickly. The biggest job was cutting out the hole and fitting the used white cast iron sink that Rose had found at the Re-Store.
After insisting that we store that old sink in the basement for at least 7 years, she finally found a use for the thing. It is a weird size that just barely fit
into the existing sink base unit but now it looks great!
 |
| Rose's salvage sink $30 |
As I got the counters all in and fastened down I was standing around admiring how great they looked and thinking, "there, that's done, on to the next step." Of course that's when my lovely wife dropped the bombshell that she now wanted to get rid of the lazy Susan unit in the corner cabinet and replace it with some slide out pot racks.
I may have reacted shall we say "strongly", since I had mentioned it earlier when the counters were off and was assured that no, we weren’t going to be ripping it out. “Are you sure dear?” I asked, “because now would be the time to do it while the counters are off.”
But "nooooooo" I was told, until I was all finished installing the counters and then it magically changed to "YES", I should have known!
As it turned out it wasn’t too difficult to take out with a little help from my favourite power tool, my sawzall, oh, oh, oh, oh, oh, that thing is amazing at demolishing stuff.
 |
| Removing the Lazy Susan |
The biggest problem was that once I cut a hole in the side of the cabinet and Junie our granddaughter learned she could climb inside and make a fort in there, I was lucky to get it done without breaking her little heart. She’s getting used to renovations though and seems to just roll with it, enjoying each phase of the process.
 |
| Junie in her temporary "fort" |
Speaking of Junie, one day after we looked after her during the renovation and she was “helping me” all day she went home and was busy moving stuff around and when her mom asked her what she was doing her response was. “I'm the papa, making everything nice". She was apparently, “remodelling.” What a sweetie!
The pot rack drawers turned out great and after I was finished I noticed that there was about 6 extra inches of clearance so I made a nice little spice drawer as well. I’m particularly proud of the drawer as I made it for about $10 and it works great.
 |
| The new spice drawer |
 |
| And the pot racks |
Next we removed one of the upper cabinets, April helped me replace the kitchen window, (she now loves the Sawzall almost as much as I do) and we completely tiled the wall around the window right to the ceiling.
Next I installed 2 floating shelves that I made myself from the same rubberwood countertops that I used for the counters and if that wasn’t enough, I boxed in the extra space above the cabinet so it goes right to the ceiling now.
 |
| April helps me tile the backsplash |
 |
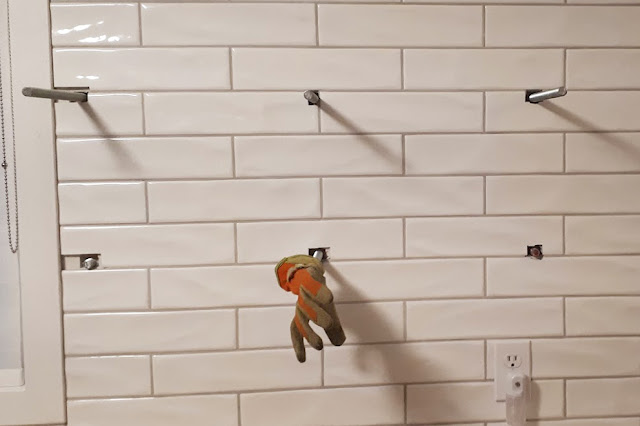
| It's coming along-holes are for the floating shelf pins |
Rose likes to "inflict" I mean "show me" various blogs with ideas for doing some similar renos and sometimes they are even helpful. One of them was about installing floating shelves and since they seemed workable, I shamelessly used their ideas- with a little tweaking of course.
 |
| Getting ready for the floating shelves |
I drilled holes in the studs about 3 inches deep and threaded 5/8th rods into the holes and then drilled slightly larger, matching holes into the shelves and pushed the shelves on and just like that, floating shelves. Actually that all involved about 6 hours of work and cost more than commercially available shelves but hey, it’s “custom”.
 |
| The partly finished kitchen |
All that’s left to do on that wall is a little more tile, a crown molding along the top of the cabinets at the ceiling and to paint all of the kitchen cabinets. In part 2 of this little renovation blog we will be doing all of that plus building a new custom hood vent. That should be fun! Not!
So far it’s been going great and we both love the renos that we’ve completed. We are taking a much deserved Christmas break and then we get back at it in January. We’ve got a little bit of time before cabin season starts again in April and this year I’m determined not to miss a minute of it so this renovation has got to be done before then!

No comments:
Post a Comment